Showing posts with label veg snacks. Show all posts

NAVANAKKI DOSA/MILLET DOSA


Navanakki or foxtail millet is a good source of protein and dietary fibre. It is mainly consumed in southern India. Many recipes, both sweet and savoury are made from navanakki.

The process of soaking, grinding followed by fermenting the dosa batter is similar to the rice dosa batter preparation. The given proportions of navanakki dosa yields crispy dosa.


The taste of navanakki dosa is different from the regular rice dosa. It can be relished with coconut chutney and potato sabzi. Onion, tomato and peanut chutney is also a good option.

It is the beginning of winters, the weather is not very warm here in Hyderabad. I kept the dosa batter overnight in the preheated oven and it fermented really well.


The temperature of tava or griddle should be not too cold or not too hot. In both the conditions the batter may not spread evenly, it will stick to the ladle while spreading. You may have to make a couple of trail rounds to get the correct temperature. Once you get the hang of the correct temperature, the mess can be easily avoided.

Recipe for Navanakki dosa


Ingredients for Navanakki dosa


  • 3 cups navanakki or foxtail millet
  • 1 cup boiled rice
  • 1 cup urad dal or black gram dal
  • Salt to taste
  • Oil or ghee for frying

How to make


Wash navanakki, boiled rice and urad dal 2 to 3 times. Soak for 4 hours.


Grind to a fine, smooth batter. Add some water while doing so or else your grinder may get overloaded.

Add salt and mix well.

Cover with lid and keep the batter in a warm place (I kept it in preheated oven) overnight for fermentation.


As you can see in the picture the batter has fermented really well.

Mix with a ladle, add water to get a thick but pouring consistency. If your batter consistency is correct skip this step.


Spread a ladle of batter on medium hot tava or griddle to make a round shaped, thin dosa.


Spread a teaspoon of oil or ghee around the edges. Once the edges are brown remove with a flat spoon. If the dosa is thick flip it and cook for a minute.

Give it a fold from the centre. Serve with chutney, sambar or potato sabzi.

CORN CHIPS


One packet of corn chips bought from market is never enough. You can have loads of it ….Here is a simple to make recipe of corn chips at home.


Corn chips are made from corn flour or makke ka atta which is coarse in texture and yellow in colour, unlike the white corn flour which is fine in texture. Maida or all-purpose flour is added to corn flour to make the dough rollable or else it will tend to tear from the edges like makke ki roti.


Corn chips make a very good snack for your impromptu parties. Serve it with salsa or a quick dip or just pour some cheesy sauce over it. Also, it makes a nutritious option for your kid’s tiffin box.


I make these chips in large quantity as they are always high on demand. I like to fry the chips to get that nice crispyness and even colour on them. You can even bake these chips at 180 deg Celsius for 20 to 25 minutes.

Recipe for Corn Chips


Ingredients for Corn Chips


  • 2 cups corn flour (yellow) or makke ka atta
  • 1 cup maida or all-purpose flour
  • Salt to taste
  • Oil for frying


How to make


Mix the corn flour, maida and salt in a mixing bowl.


Add water in small quantities and knead a dough. Let it rest for 10 minutes.


Divide the dough in three equal portions.


Roll it into thin round rotis. Prick with fork.


Cut into desired shapes and size.


Fry in medium hot oil until crisp.

Store in airtight container up to a month. Serve with your favourite dips and salsa.

JODHPURI MIRCHI VADA


Nai sarak in Jodhpur use to be the hub for shopping and eating. Good shopping followed by a couple of mirchi vadas at Janata sweets is one of the many memories from Jodhpur.
Mirchi vada is the most popular rajasthani street snack. Its is similar to batada vada or alu bonda from south.


Mirchi vada big, fat green chilli stuffed and covered with spicy, tangy potato mixture; then coated with gram flour batter and finally deep fried.

One mirchi vada is quite filling. It can be sliced into three to four pieces and served with ketchup as an appetizer.

Any large and non-spicy variety of chilli can be used such as bhavnagari chillies. I have used jalapeno chillies here as these were the only variety available with the supermarket. I have deseeded the chillies to reduce its pungency. Depending on the chilli you can adjust the red chilli powder to be added. The given proportions are totally at level with the rajasthani palate.

The number of potatoes required is equal to the number of green chillies to be used for this recipe. This is my rough proportion of green chillies and potatoes. I find it easier this way than weight measurements.

Recipe for Jodhpuri mirchi vada


Ingredients for Jodhpuri mirchi vada


  • 6 green chillies (fat and non-spicy variety)
  • 6 medium-sized potatoes
  • ½ tsp roasted cumin powder
  • ½ tsp coriander powder
  • 1 tsp chilli powder
  • 1 tbsp dry mango powder/ dried pomegranate seeds
  • ¼ +¼ tsp turmeric powder
  • 2 cups gram flour
  • 10 cashew nuts (chopped)
  • ¼ cup raisins (chopped)
  • ¼ cup coriander leaves (finely chopped)
  • Salt to taste
  • Oil for frying

How to make


Boil the potatoes. Remove its skin and lightly mash it. Avoid mashing it completely. Finely mashed potatoes, it does not hold on to the chillies and slips away.


Add salt, turmeric, cumin powder, coriander powder, dry mango powder, red chilli powder, cashews, raisins and coriander leaves.


Combine all the ingredients and keep aside.


Make an incision in chillies and deseed them.


Stuff the chillies with the potato mixture and cover the chillies with the same. The thickness of the potato coating should be 3/4th to 1cm.


Make a smooth batter of gram flour with a ¼ teaspoon of turmeric powder, salt and a cup of water.

The batter should be of coating consistency.

Now coat the chillies with the batter and deep fry for one minute on each side or until the coating is cooked.

Serve with sweet and sour tamarind chutney.

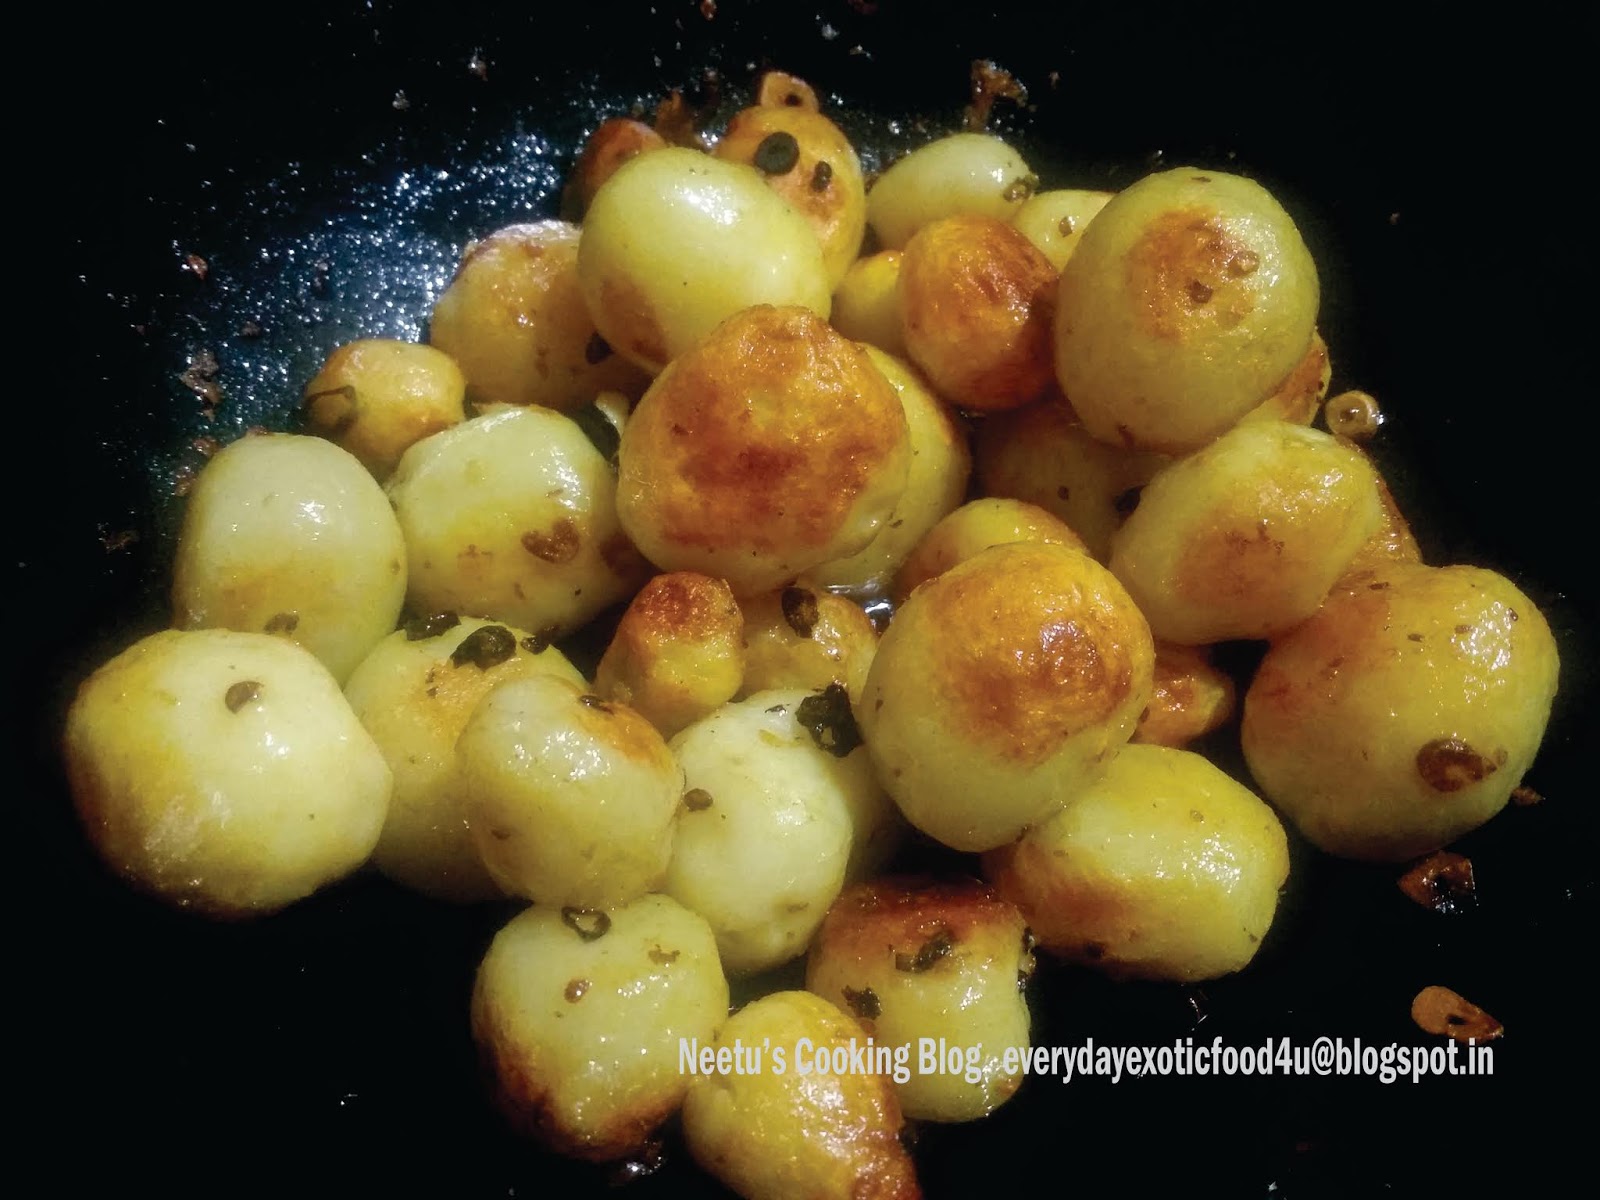
SESAME POTATOES


 Sesame potatoes my way! Such dishes add variety and flavour to parties. This is a popular snack at my parties. During one of the dinner party preparations, I wanted to make something tongue tingling with baby potatoes. I wanted to take advantage of the fact that baby potatoes are bite-sized and round in shape which can serve as a good starter. A little experimentation… and that is how this dish has never gone out of my favourite party snacks list. One more reason for Sesame potatoes being my favourite is it doesn’t require any elaborate preparation and a very simple procedure.


All the baby potatoes should be more or less of the same size. Do not take too small or too big ones. Sweet dark soya sauce can be substituted with dark soya sauce and sugar. Remove the potatoes that are over boiled as they may get squashed and spoil the dish.

Recipe for Sesame Potatoes


Ingredients for Sesame Potatoes


  • 500 gms baby potatoes
  • 6 green chillies (finely chopped)
  • 10 cloves of garlic (finely chopped)
  • 2 tbsp sweet dark soya sauce
  • 2 tbsp roasted sesame
  • 3 tbsp oil
  • Salt and pepper to taste


How to Make


Boil the baby potatoes till half done. Peel and keep aside.


Heat oil in a kadhai (skillet). Add finely chopped garlic and green chillies. Saute for a minute.


 Add the baby potatoes and saute on medium heat till it turns golden and crisp from outside.


Reduce the heat to low and now add soya sauce, salt and pepper. Saute for 3 to 4 minutes on low heat.


Sprinkle the sesame on the potatoes and remove from heat.


Pierce with toothpicks before serving.

PURI RECIPE FOR PANI PURI


One or two packets of puris are never enough. We have some members who are all capable to win a paani puri competition. The evening I plan to make paani puris it is very clear that it is a skip for the regular dinner. Most of the times, paani puri is carried forward to the next day breakfast or brunch.


Eating pani puri is an art. Enjoying paani puri is all about that one moment when these flavour bombs burst into your mouth with sweet, tangy and spicy flavours. A crispy puri doubles up the enjoyment.

Make your own puris with very little effort. Suji or semolina makes very crispy and melt in mouth puris. It is essential to use the fine variety of semolina.

I am yet to meet someone who doesn’t like pani puri. Pani puri is also called as pani batashe or puchkas.

This recipe is for those who don’t get satisfied with  few paani puris and for those who believe that there is nothing better than home cooked food.

Recipe for Puris


Ingredients for Puris


  • 1 cup semolina
  • ¼ cup maida or all purpose flour
  • 1 tbsp oil
  • Salt to taste
  • ½ cup water

How to make


In a mixing bowl, mix together semolina, maida and salt.


Add water and knead soft dough. Cover and keep aside for 30 minutes.

After 30 minutes the dough may become harder as the semolina absorbs the water in dough and swells up.


Take some oil on your palms and knead again for 3 to 4 minutes until the dough becomes soft.

Divide in two equal portions. Roll it as thin as possible (shape is not important).


Using cookie cutter or jar lid cut roundals as shown in the picture. I have used kulfi mould with sharp edges. Choose appropriate size of the puri.


Heat oil till medium hot. Drop the puris one by one such that you get enough time to gently press each puri. This helps the puris to puff up.


Reduce the flame. Fry till the puris are crispy and golden in colour.


It is fine if some puris don’t puff up. These flat puris can be used for shevpuri.

After frying, transfer the puris to a sieve or metal mesh line with kitchen paper. Keep this container in a flat plate where the excess oil will get collected.

Let puris cool completely before storing it in an air tight container. It is advisable to line the container with kitchen paper to get rid of any leftover oil.

These puris can stay upto 1 to 2 months depending on the climatic conditions.

MOONG METHI PAKODA


Moong pakoda have consistently held their position in my list of appetizers for a number of parties that we have hosted. It is light on stomach unlike other pakodas as it doesn't absorb oil. 

Though my mother was a good cook herself, once in a while she would treat me and my brothers with these moong ke pakode with imli ki chatni from a popular pakodewala, who would make only moong or split green gram pakodas. The pakodas used to be spongy and soft with a crispy outer layer.

Moong methi pakodas recipe is inspired from my childhood memories of moong pakodas. This is a easy to make recipe with few ingredients. To make them more appetizing deep fry them only after the guests arrive and serve them piping hot with your favourite chutney or sauce.


Recipe for Moong methi pakoda


Ingredients for Moong methi pakoda


  • 1 cup dhuli moong dal or split greengram dal
  • 1 cup fenugreek leaves (roughly chopped)
  • 1 tsp green chilli paste
  • ¼ tsp turmeric powder
  • ½ tbsp coriander powder or crushed coriander seeds
  • Salt to taste
  • Oil for frying

How to make


Soak moong dal for an hour.

Drain the water and grind it to get a smooth paste. Add little water if required.


Now add in turmeric powder, coriander powder, green chilli paste and salt. Mix well.


Now add the fenugreek leaves.


Heat oil for frying.

Using a spoon drop small portions of batter in oil. Fry for two minutes or until golden in colour.

Serve with tamarind chutney.